Showing posts with label homemade. Show all posts

Sunday, February 12, 2012

for the ladies

I have had a crazy start to the new year with lots of traveling!  Starting at Christmas I went to Cincinnati, then Eastern Florida, then New York, down to Miami, Western Michigan, back to Cincinnati, and ended the travels in Tampa.  That was one month.  While my frequent flyer miles were growing, my mixer was getting dusty.  As soon as I had some down time in Chicago I decided to get to work.
Three of my best friends have birthdays in January.  Unfortunately, none of them are in Chicago.  I had all intentions of baking them each a different cupcake and then shipping them out.  Nope.  That didn't exactly happen.  I ended up making one flavor to honor all of them.  I didn't send any, but it is the thought that counts, right??


I made red wine and chocolate cupcakes.  This is fitting because I have had a lot of wine and chocolate with these ladies.  I went to Trader Joe's and picked up a bottle of 2 buck chuck.  I didn't find it necessary to use a nice wine when baking.  
The recipe had quite a lot going on, but I made it work... This wonderful recipe came from sprinklebakes.com

Cake:
1/4 cup unsweetened cocoa powder
2 oz. dark chocolate broken into small pieces
1/4 cup boiling water
1 stick butter, room temp
3/4 cup granulated sugar
2 large eggs
1/2 cup plus 1/8 cup all purpose flour
3/4 tsp baking powder
1/8 tsp baking soda
1/2 tsp salt
1/4 cup red wine

1. Preheat oven to 350 degrees.

2. In a medium heatproof bowl, combine cocoa powder and chocolate pieces, whisk in the boiling water until the chocolate is melted and the mixture is smooth.

3. In a large bowl, cream the butter and granulated sugar.  Beat in the eggs until well blended.  Sift in flour, baking powder, baking soda and salt.  Mix until just combined.  Alternating, add the chocolate mixture and wine, mix until batter is smooth.

4. Divide batter among cupcake liners, filling them about halfway full.  Bake for about 20 minutes.

Frosting:

1 cup wine plus 4 tablespoons, divided
1/4 cup granulated sugar
2 sticks of butter, softened (not room temperature, butter should still be a little cold)
3 cups powdered sugar
1/4 tsp salt

1. Place 1 cup wine and granulated sugar in a small saucepan over medium high heat.  Stir until sugar is dissolved, and simmer until mixture is reduced to just 1/3 cup.  Allow to cool completely

2. In the bowl of a standing mixer with the whisk attachment, combine the softened butter and confectioners' sugar.  Mix on low speed at first, and then on high until mixture is fluffy.  With mixer running, gradually pour in the cooled wine reduction.  Add salt and beat until well combined.  Scrape down the bowl as necessary.

3. Again, with the mixer running, gradually pour in the 4 tablespoons of wine one  tablespoon at a time until thoroughly mixed.  Then ice away (make sure the cupcakes are cool before icing)!
These babies are awesome!  I didn't love the icing alone, but the combo together is great.  You should know there is a lot of wine in these cupcakes.  I didn't even feel bad finishing the bottle.  

I would absolutely reco making these!

So, Happy Birthday! Love you!!!

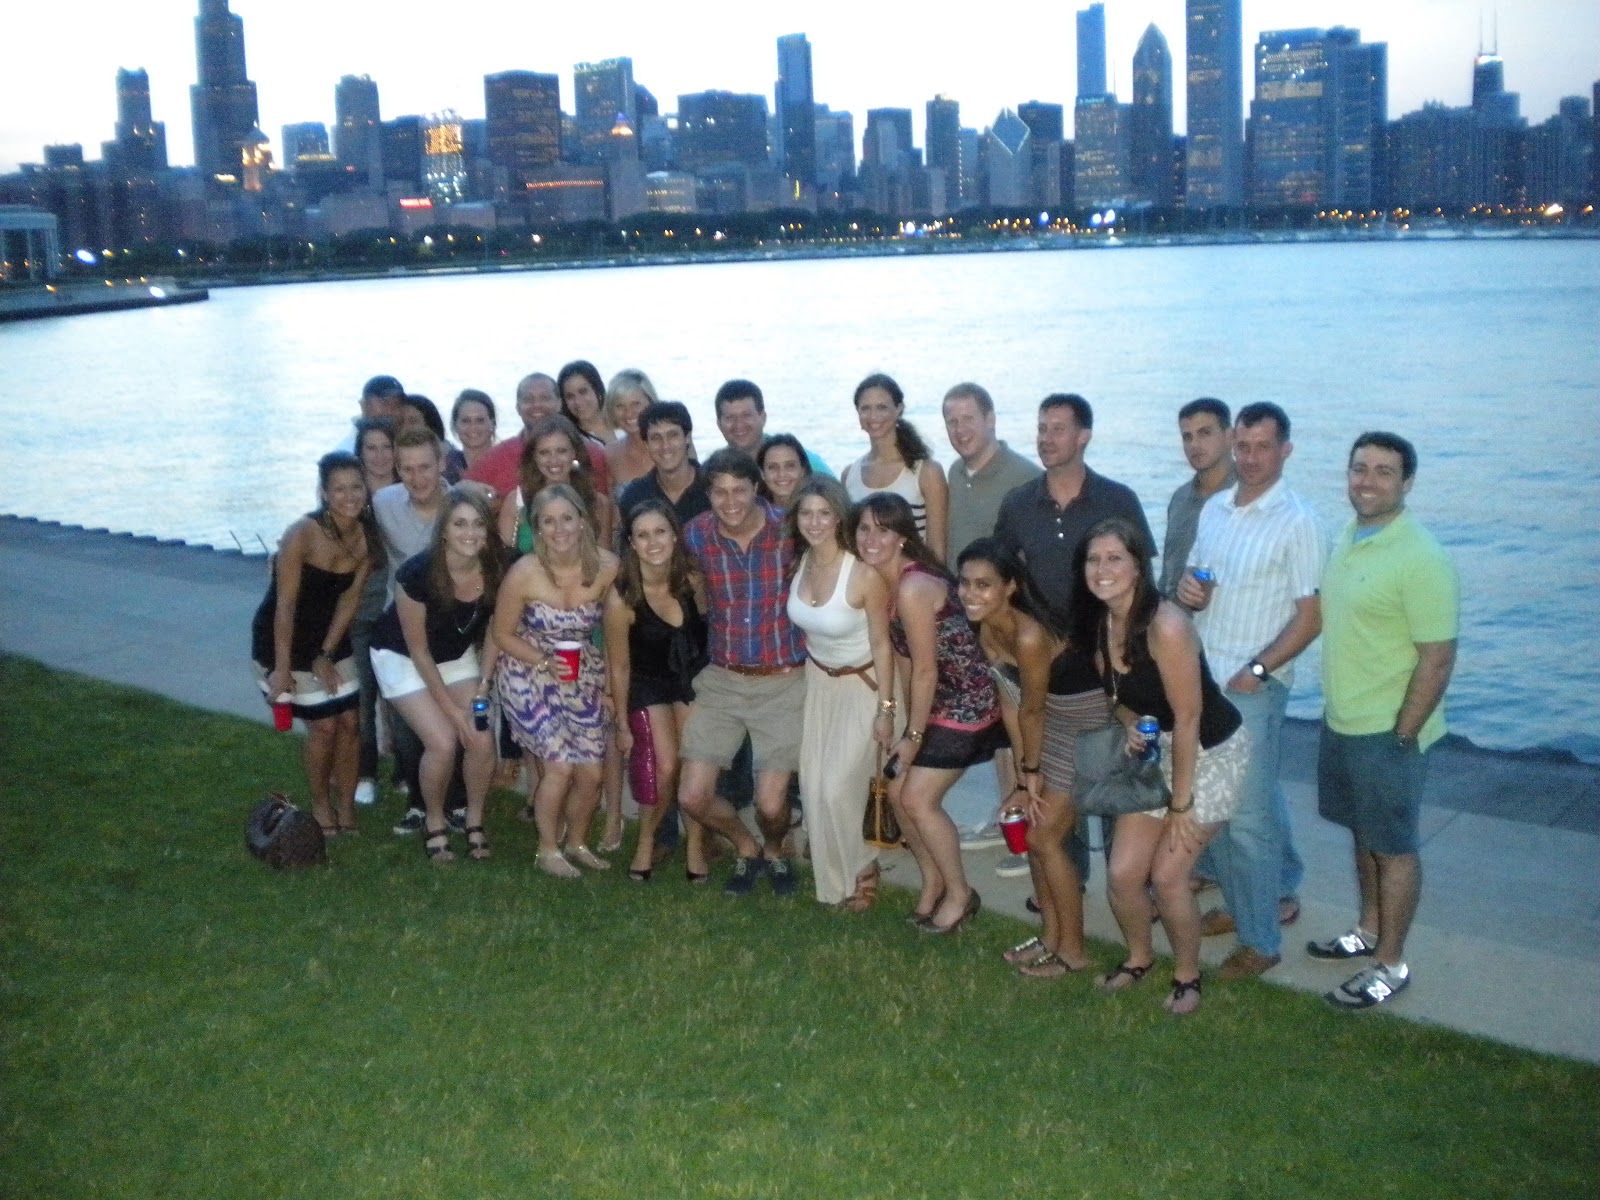
Birthday Girls: Erin, Alyson, & Stacy

enjoy!
j

Thursday, February 2, 2012

Cross Country Cakes

I recently came across a recipe for Biscoff cupcakes.  Most people aren't familiar with Biscoff unless you have flown on Delta.  They are the little cookies the flight attendants hand out to you during the beverage service.  
I used to think these cookies were manufactured specifically for Delta until I met my friend Laura.  Laura was my roommate for 3 years in college and her mom would send her giant tins of Biscoff cookies for every birthday and holiday.  When I saw the recipe I knew I had to make them for her.  The problem is that we no longer live in the same city.  She lives in Big Bend National Park down in Texas.  I wasn't sure if she could receive packages because the first few years she lived down there she didn't even have cell service.  There was even a summer without running water...seriously.  However, she assured me the package would make it, so I hopped in the kitchen and got to work.  
The Beautiful Ms Laura.  She loves that headlamp.
The reason these are considered Biscoff cupcakes is because they are made with Biscoff spread.  Looks like a jar of peanut butter, but instead, creamed cookies.  You can't just buy Biscoff spread in the store (or at least I have no clue where you would), so I ordered some off of Amazon.  I would love to know other uses for this spread outside of cupcakes.  Do people put it on a bagel? Apple? Biscoff & jelly sandwich?

The recipe came from thenovicechefblog.com

ingredients:

1 1/4 c APF
1 tsp cream of tartar
1/2 tsp baking soda
a pinch salt
1/2 c Biscoff spread
1/2 c brown sugar
1/3 c vegetable oil
1 egg
1 tsp vanilla extract
1/2 c half and half

directions:

Preheat oven to 350 degrees. 
In a small bowl, whisk together first four ingredients. Set aside.
In a stand mixer, beat Biscoff spread and brown sugar until creamy. Add vegetable oil, egg, and vanilla, mix well.
Slowly mix in the flour mixture, alternating with the half and half, until completely combined.
Spoon cupcake batter into tin, about 1/4 cup batter per cupcake. Bake for 16-18 minutes, until a toothpick comes out clean. 


These cupcakes were originally made with a marshmallow frosting, but I didn't think that would hold up so well on the way to Texas.  I just used a basic cream cheese frosting then topped with crumbled cookies.  
I didn't love the consistency of the cupcake.  When I bought the spread it came in a pack of two, so I will definitely try to make them again, but I will take a different approach than the recipe above.  I know you are all waiting on the edge of your seats to see how they turn out, so stay tuned!


xx
j

Wednesday, January 25, 2012

Right to womanhood...

I think for men the "right to manhood" is usually when they get their first car.  For ladies, I think it is baking an apple pie.  As shocking as it may sound, I have never baked one from scratch on my own until this year (gasp).  

This fall some girlfriends and I went to Country Line Orchard, about 45 minutes outside of Chicago.  I figured if I was going to bake an apple pie from scratch I may as well pick the apples too.  My all time favorite apples are Honeycrisp and Pink Lady, but they were not in season at the time.  
I settled on Gala which would still be in my top 5.  I didn't want to bake with Granny Smith because I feel like EVERYONE uses granny smith in pies.  "They give it so much flavor" is what I always hear.  Well, personally I didn't want my pie to be super tart so I went with the more subtle Gala.  The picking was fine, but I was bored after about 5 minutes.  The selection was pretty picked over (no pun intended) so I had to really search for the good ones.  Luckily I am tall so I was able to grab some of the apples that were left up top.
After picking the apples we decided to go through the corn maze (again bored after 5 minutes).  Before going in the guy running the show told us that the maze was pretty muddy and if we didn't want to slip and fall or get dirty then we should buy booties.
Only two of us decided to buy them - yes, we looked like morons.
The worst part is that there was hardly any mud in the maze.  Maybe a small section that was easily jumpable for a full grown adult.  Next time I am risking it.  After all that fun it was time to actually bake the pie....  I used a recipe from momswhothink.com


Pie Crust Recipe
Makes two 9-inch pie crusts
Ingredients:
2 1/2 cups all-purpose flour
1/2 teaspoon salt
1 cup butter, chilled and diced
1/2 cup ice water
Directions:
1. Combine the flour and salt in a large bowl.
2. Cut in the butter until the mixture resembles coarse crumbs.
3. Stir in the ice water, a Tablespoon at a time, until the crust mixture forms a ball.


4. Wrap dough in plastic wrap and refrigerate for 4 hours or overnight.
5. Sprinkle flour onto rolling surface. Roll dough out, then divide in half. Roll each half to fit a 9-inch pie plate.
6. Place crust in pie plate, pressing evenly into the bottom and sides.

Filling Ingredients:
8 cups sliced,peeled apples - about 3 lbs.  
2 Tablespoons lemon juice
3/4 cup white sugar
1/4 cup brown sugar
1/4 cup all-purpose flour
1 teaspoon ground cinnamon
1/4 teaspoon ground nutmeg
2 Tablespoons butter
1 egg yolk
1 Tablespoon milk
Directions:
1. In a large bowl, toss the sliced apples with lemon juice.
2. Combine sugars, flour, cinnamon and nutmeg; add to apples and toss well to coat.
3. Fill pastry lined 9 inch pie pan with apple mixture. Dot with butter.
4. Place second crust on top of pie filling, cut slits in top of crust to vent. Seal the edges of the crust with a fork or by hand.  - I chose to lattice the top.
5. In a small bowl, beat the egg yolk and milk. Brush mixture over top crust.
6. Bake at 425 degrees F for 15 minutes.
7. Reduce heat to 350 degrees F and bake 40-45 minutes more or until crust is golden and filling is bubbly.
I forgot to brush with the egg mixture, then tried to do it last minute while it was baking.  That is why it looks kind of weird on top.  Regardless, this pie was AMAZING.  Couldn't get enough of it.  

enjoy!
j

Thursday, October 13, 2011

Baby Cakes

I'm an aunt..again!  You may remember a few posts back when I attempted to ship some cupcakes to my niece and nephews, well now I get to add another little lady to the list.  Hannah Beck was born on September 12th!  Now the count holds at 3 boys and 2 girls.  I was lucky enough to get back to meet her shortly after she came home.  Obviously, I had to greet her with cupcakes!

I whipped up the same vanilla cupcakes with vanilla buttercream that I sent to the other nuggets back in the beginning of September - Recipe here


Pink icing seemed highly appropriate
I found these amazing boxes at Michael's to travel with and deliver the cupcakes!
Per usual I had to take them through security at the airport and squish em on the plane til they were safe in Ohio.  The fact that these boxes have individual holders make it so much easier on me.  Usually it is a test of my balance and I end up with one rebel cupcake that decides to somehow do a backflip mid-trip.
Not this time!  I love these boxes.  They also look so much classier than when I gift cupcakes in Glad.  There are several options for any occasion.

Enjoy!
j

Friday, September 23, 2011

mmm dot

This is going to be one of my favorite posts, because it involves something I care a lot about (other than cupcakes).  A good friend of mine, Matt Hay, was diagnosed with Neurofibromatosis Type 2 (NF2) several years ago.    Matt has racked up several surgeries, including brain and spine.  After one of his surgeries the doctor told him he may never be able to walk again.  Well, on September 11th he completed an IRONMAN.  Yep, 140.6 miles.  If it were me I would send that doctor a picture of me crossing the finish line.


Matt is one of my regular cupcake tasters but I figured for an event like this I would make him his own batch.  He doesn't like the fruity ones so much, so I knew I had to stick in the chocolate world.  I decided on a chocolate chip cupcake with chocolate cream cheese icing.


I have been eyeing Martha Stewart's Cupcake book for some time now and I finally went out and bought it.  There are over 100 recipes in the book and I would love to try all of them.  This is my first...


Chocolate Chip Cupcakes:
3 1/4 c plus 1 tbsp cake flour
4 1/2 tsp baking powder
1/4 tsp salt
1 tbsp vanilla
1 c plus 2 tbsp milk
1/2 c plus 6 tbsp unsalted butter, room temp
1 3/4 c sugar
5 egg whites room temp
2 c choc chips


Just looking at the ingredients I should have known this recipe would not be one of my best.  I would love to know how they ended up with all these numbers - 1 c plus 2 tbsp??  I mean really...kind of specific.  I bake a lot and this is the first run in I have had with these crazy measurements.


So to actually make the cakes...


Whisk together cake flour, baking powder, and salt until combined. 
This is the first time I have ever used cake flour.  I typically stick with all purpose un-bleached.  I didn't think it made a huge difference.  Combine milk and vanilla in a separate bowl. 
LOVE my Mexican vanilla.  Starting to get a little low, so I guess I should plan a trip down south to get more!

With an electric mixer beat the butter on medium high until smooth.  Add the sugar and beat until fluffy.  
I also decided to try bakers sugar for the first time.  I did not notice a difference.

Reduce the speed to low and add 1/3 of the flour mixture, then half of the milk mixture, then another 1/3 of the flour, the rest of the milk, and then the last of the flour.  Be sure you are beating all ingredients until they are fully combined in between each addition. 

In another bowl beat the egg whites until stiff peaks form.  Fold 1/3 of the egg whites into the batter.  Then fold in the rest until just combined.  
This step was a total red flag for me.  If you remember the lazy egg issue from my last post - the yolk is what makes the cupcake moist.  While slightly uneasy about this step I still carried along because I figured Martha knows best.

Lastly, the chips!  Lightly toss them in flour and then gently fold them into the batter.  The flour will help prevent all of the chips from sinking to the bottom.

Divide your batter into cups and bake at 350 degrees for roughly 20 minutes.  Cake is ready when toothpick inserted into the center comes out clean.  Or you can tap one of them lightly and it should bounce back.  Once out of the oven let sit for a minute then transfer them to a cooling rack to cool completely.

I then turned to cupcakeproject.com for the frosting - Chocolate Cream Cheese

8oz cream cheese, room temp
1/4 c unsalted butter, room temp
4 c powdered sugar
1/2 c cocoa powder

Mix cream cheese and butter until smooth.  Mix in powdered sugar - 1 cup at a time.  Mix in the cocoa powder and then beat until all ingredients are combined. 
Yum!
Once the cupcakes are completely cool go ahead and frost away.  Now, since these were to celebrate an absolutely amazing accomplishment, I wanted to add a little flare.  The symbol for an ironman is the M-Dot.  Pretty straight forward - it is a block letter M with a dot above it.  Looks like a little man.  I thought it would be cool to have the cupcakes topped with the symbol.  First, I melted some white chocolate.  I then put a little bit of the melted chocolate into a cupcake pan and then stuck in the fridge to cool and become solid.  Once solid I popped them out and they were perfect little circles.  I then melted some regular milk chocolate for the decorating.  Threw it in a piping bag and then decorated the white discs with the M-Dot and "140.6".  I was a little shaky, but I think they turned out alright. 
I then plopped the chocolate pieces on top of the cupcake.

Matt decided to take the cupcakes home to share with his support team!
Too cute, right?
Matt completed the ironman in 15 hours and 41 minutes.  His day started at 3:30AM
With Crew Chief, Nora, moments before the swim
The event was in Sandusky, OH.  While Matt was pushing through the bike leg of the triathlon, Nora went and rode every roller coaster at Cedar Point.  I don't know why but I think that is too funny.  Picturing her as a single rider all day at an amusement park.  
Finished!
He practiced this finishing pose for weeks.  Totaly worth it.  If I just completed 15 hours of swimming, biking, and running you would be scraping my body off the pavemet. 


While all of this was going on in Ohio I decided to enjoy the Bears season opener!  Tough day...


If you want to hear more of Matt's story, the below link is for a clip on Matt that aired on WGN.  Big Time!


xo
j

Wednesday, September 21, 2011

PB & Promo

One of the girls on my team was recently promoted.  In an attempt to be a good manager I made her cupcakes to celebrate.  Secretly a couple weeks ago I asked which cupcake flavor she preferred.  Peanut Butter was one of her top choices, so that is what I made.  I was a little nervous because I have not worked with peanut butter before, but it was AMAZING!


I just whipped up a standard chocolate cake, but I was lazy and it didn't turn out great.  I didn't have eggs in the house, only egg whites.  If you are questioning how that is possible, I get the egg white cartons (again, lazy).  So instead of using whole eggs in the recipe I just used the egg white equivalent.  Big mistake.  The yolk is what makes the cupcake moist.  If you have read my posts you know I do not like a dry cupcake. 

The frosting however was sooo delish!  I snagged this recipe from Browneyedbaker.com (I normally wouldn't support a website promoting brown eyes, but this was worth it).

1 c powdered sugar
1 c creamy peanut butter (I used JIF - nothing else compares)
5 tbsp unsalted butter, room temp
3/4 tsp vanilla
1/4 tsp salt
1/3 c heavy cream

Put all ingredients into a mixer except for the cream.  Beat them on medium until creamy.  Add the cream then beat on high until light and smooth.  Top your cupcakes and you are good to go.  I am warning you - this stuff is so good you don't even want to put it on the cupcakes.  Just eat it by the spoonful!

Overall the cupcakes were fine.  However, I don't like something to just be fine when it can be outstanding.  I will be making these again very soon with a non-lazy cake recipe!

Enjoy!
j

Friday, September 9, 2011

Cookie Time

Two of my friends recently got engaged!  I am so happy for them because they are seriously one of the cutest couples I know.  Unfortunately, they live in Ohio so I was not able to celebrate with them.  I decided I would send them a sweet treat to share.  Of course I initially thought cupcakes, but since they didn't travel so well to my little nuggets I thought I would give cookies a shot!  Traditional Chocolate Chip seemed appropriate.


This recipe has been tucked in the back of my baking binder for the longest time, but it was always overlooked until now!  Unfortunately, I have no clue where I originally found it....


Recipe:
2 sticks butter (room temp)
1 1/2 c firmly packed light brown sugar
2 large eggs (room temp)
1 tsp vanilla
2 1/2 c all purpose flour
1 tsp baking soda
1/2 tsp salt
1 bag choc chips (12 oz)


Beat butter and brown sugar on medium until well combined.  Beat in the eggs one at a time.  Add vanilla and beat until creamy.  


In a different bowl, sift together flour, baking soda, and salt.  Add the flour mixture to the butter mixture little bits at a time.  Beat until all ingredients are blended together.  Gently mix in the chocolate chips.


Drop dough in balls roughly 2 inches apart on a buttered cookie sheet.  I find it is easiest to use a melon baller.  This way all cookies are the same size and bake evenly.  


Bake at 400 degrees for roughly 7 minutes.  The cookies should be lightly browned on top.  Once out of the oven let them sit for a minute then transfer them to a wire rack to cool.  


I found this great chalkboard jar at World Market and jazzed it up a bit with ribbon tape.  Also, how cute is that card!  That is exactly how I responded to her text when she first told me.  


Now, I am my toughest critic by far.  You will never catch me bragging about anything I bake because I always feel I can improve.  However, these cookies are a different story.  My friend Matt, who by the way is brutally honest, said these are some of the best cookies he has ever had.  I also made them last weekend for my moms friends and they went crazy over them.  I mixed chocolate and peanut butter chips and they were delish!


This will absolutely be my go to recipe whenever I need to make cookies.


Enjoy!
J

Tuesday, September 6, 2011

Spreading the Love

Not only am I an avid cupcake eater/blogger, I am also an Aunt.  I have one adorable niece, and 3 amazing nephews (one more niece due mid September!!!).  Unfortunately, they all live in different states.  I have 2 in Ohio and 2 all the way in Florida.  With the distance between us we only get to see each other a few times a year.  It has been a particularly long time since I have seen all of them so I wanted to send some sweets so they wouldn't forget their Aunt Jenny!  
Aren't they the cutest?!

I decided to make standard chocolate and vanilla cupcakes with a vanilla buttercream.  When dealing with kids under 5 I figure I should keep it simple.  I also thought they might enjoy the pretty colors and sprinkles! 

I just used a standard sour cream recipe for both:
1 1/4 cup all purpose flour unbleached
1/2 tsp baking powder
1/4 tsp baking soda
1/4 tsp salt
2 eggs
1 cup sugar
1/2 cup (1 stick) unsalted butter, room temp
1 1/2 tsp vanilla extract
1/2 cup sour cream

(for the chocolate version you will need all the same ingredients, plus 4 oz semisweet chocolate)

Mix first 4 ingredients in a medium bowl and set aside. 
In a large mixing bowl, beat eggs and sugar until creamy
Add the butter and beat until combined
Add the vanilla and beat on low for a couple minutes until all ingredients are combined
Slowly add in the flour mixture little bits at a time beating on low until all ingredients are well blended. 
Then add the sour cream and....yep, beat until combined. 

Now if you are making these chocolate, melt the 4 oz until smooth.  I used Baker's chocolate and just microwaved, but if you want to get fancy you canuse a double broiler.  Once the chocolate is melted add to the batter and mix together.

Fill cupcake liners 2/3 full and bake at 350 degrees (for large cupcakes roughly 20 minutes, for minis roughly 16 minutes)

Let them cool then frost.
Then there was the dilemma of getting the cupcakes from Chicago to Ohio/Florida....
I found these great push pop containers on Cup Kate's Event Design (cupkateseventdesign.com).  These were perfect because I could fit 2 minis in each.  Unfortunately, I was told they didnt hold up that well.  I am assuming it had to do with how I shipped them.  Next time I would prob put them in a sturdy box rather than a UPS package.  I am also thinking they might travel better if the icing was not on top?

Regardless, I think these containers are too cute.  They would also be great for a birthday party/baby shower favor. 

Enjoy!
J

Thursday, August 18, 2011

Sweet Home Apple Pie

One of my favorite people in all of Chicago decided to up and leave me for bigger and better things.  David Dailey of The Dailey Dish has moved to New York City.  It only made sense to send him off with cupcakes.  Unfortunately, I was traveling the week leading up to his departure so I was not able to actually give him any of the cupcakes.  
Going Away Party

In his honor I decided to make Apple Pie cupcakes.  My reasoning is 2-fold. 1) New York City - Big Apple 2) David is originally from Alabama, when I think of a southern dessert I think of apple pie.  Also, if you remember my post from Society Bakery in Dallas, I absolutely fell in love with their apple pie cupcakes.  So...maybe the reasoning is 3-fold.  


I came across an AMAZING recipe from Annie's Eats (annies-eats.net).  


1 1/2 cups unbleached all purpose flour
1/2 tbsp baking powder
1/4 tsp. sea salt
1 stick unsalted butter (room temp)
1 cup sugar
2 eggs
1 tsp pure vanilla
1/2 cup milk


Preheat oven to 350 degrees.  Sift together flour, baking powder, and salt.  In a separate mixing bowl beat the butter on medium for about a minute until fluffy.  Add sugar and beat until blended (roughly 2 min on medium).  Beat in the eggs one at a time.  Mix in vanilla.  Add 1/3 of the dry mix, then 1/2 of the milk, then another 1/3 of dry mix, then the rest of the milk, and finally add the rest of the dry mix.  Be sure that you are blending fully in between each addition.  Once all ingredients are combined divide the batter evenly into cupcake pan and bake for roughly 20 minutes or until the tops bounce back when lightly tapped.  Remove from the oven and place cupcakes on wire racks after a couple minutes so they can cool completely.


While baking the cupcakes, prepare the apple pie filling.


1 tbsp butter
1 tsp cinnamon
2 tbsp sugar
2 large granny smith apples


peel, core, and chop the apples into tiny chunks - set aside.  Heat the butter in a medium skillet on med-high heat.  Add the cinnamon and sugar and and cook for a bit until the mixture starts to bubble.  Lower heat to medium and add apples.  Cook the apples for roughly 10 minutes.  Keep stirring the mixture periodically to be sure all apples are coated with the cinnamon and sugar.  Remove from the heat and set in a bowl to cool completely.  


While cupcakes and filling are cooling it is time to mix the icing!


1 stick +2 tbsp unsalted butter (room temperature)
1 1/4 cup powdered sugar
pinch of salt
2 tsp vanilla
1 tbsp heavy whipping cream


Beat butter at medium speed until fluffy.  Add sugar - start blending on lowest speed until sugar is combined so it doesn't fly out of the bowl and all over your kitchen.  Then take the speed up to medium for about a minute.  Add salt, vanilla, and cream.  Beat at medium-high for a couple minutes until all ingredients are combined and the texture is light and fluffy.  


Once cupcakes are completely cooled, carve into the cupcakes cutting a cone shape out of the top.  Leave a rim around the side.  Add the apple pie filling then top with a dollop of icing.  


Lastly, enjoy cause these puppies are delicious!


I decided to whip up a southern meal to go along with these sweet treats.


Some Montgomery Inn ribs (brought back from Cincinnati), Corn on the cob, and homemade mac and cheese!  mmmm deliciousness


Enjoy!
J

Saturday, August 6, 2011

Movin to the country....

gonna eat a lot of peaches.  It never fails - every time I buy peaches I get that song stuck in my head!  It is currently peach season, so I had to take advantage of the fresh produce.  I absolutely love fresh peaches so I figure why not incorporate them into a cupcake.  While in Michigan I passed by a peach stand and picked up a dozen delicious peaches (yes, I got a little carried away).


With so many peaches on hand I decided to try 2 different recipes.  They are incredibly similar, but I could definitely taste a difference.


This first one comes from 52 cupcakes (52cupcakes.blogspot.com).  It is a peach cupcake with Martha Stewart's marscarpone frosting.
1-1/2 cups all purpose flour
1 tsp baking powder
1/2 tsp ground nutmeg
1/4 tsp salt
1-1/4 cups granulated sugar
1/2 cup unsalted butter, at room temperature
3 eggs
1 tsp vanilla
2 tsp grated orange zest
3/4 cup milk
2 peaches, pitted and thinly sliced and cut into thirds


Preheat oven to 350 degrees
Sift together flour, baking powder, nutmeg, and salt
In a separate bowl beat together sugar and butter until they are fully combined.  then add the eggs (one at a time).  Then add the vanilla and orange zest and beat until all ingredients are combined.  Add in a portion of the flour mixture, then a portion of the milk, and keep alternating until all ingredients have been added and the mixture is smooth.  Gently fold in the peaches.  


Divide the batter into the cupcake pan and bake for roughly 20 minutes.  All ovens vary, so the main goal is to make sure the cupcakes spring back if lightly touched or a toothpick comes out clean when inserted into the center.  


Place the cupcakes on a cooling rack and make sure they are completely cooked before frosting or you'll have a runny mess!


Icing - I thought this was a light and fluffy alternative to a standard cream cheese icing.  Mine didn't turn out the prettiest, but still tasted great.


1 lb marscarpone cheese
1/2 cup powdered sugar 
1 1/4 cup heavy cream


Beat all ingredients together on medium for a couple minutes.  All ingredients should be combined and have a fluffy texture.  Plop on top of your cupcakes and enjoy!


Recipe #2...


This recipe comes from Smitten Kitchen (smittenkitchen.com).  Peach cupcake with brown sugar frosting

3 all purpose flour
1 1/2 teaspoons baking powder
1 1/2 teaspoons baking soda
1 teaspoon salt
Pinch of nutmeg
3/4 cup unsalted butter, at room temperature
3/4 cup granulated sugar
3/4 cup light brown sugar, packed
2 large eggs, lightly beaten
1 teaspoon vanilla
1 1/2 cups buttermilk
3 large peaches peeled and chopped 


Sift together flour, baking powder, baking soda, salt, and nutmeg.  In a seperate bowl mix butter and 2 sugars until combined and fluffy.  Add eggs one at a time.  Once blended add in vanilla.  Then add the buttermilk.  Once combined slowly add the dry ingredients a little bit at a time.  Once all ingredients have been added, fold in the peaches.


Divide batter into cupcake pan and bake at 350 degrees for roughly 18 minutes.  Once baked let the cupcakes cool on a wire rack.


Brown Sugar frosting
1 1/4 cups light brown sugar
1/4 cup cornstarch
1/2 cup powdered sugar
2 8-ounce packages of cream cheese, at room temperature
1/2 cup unsalted butter, at room temperature
1/2 teaspoon vanilla


Whisk together brown sugar, corn starch, and powdered sugar.  Set aside.  In a seperate bowl, beat cream cheese and butter until fluffy (roughly 2 minutes).  Add the sugar mixture and the vanilla.  Beat for another 2 minutes or so.  Once the cupcakes are cool, top with frosting and enjoy!


I had quite a few peaches left over after making both cupcake recipes, so I decided to try bourbon peach chicken!  Recipe from myrecipes.com


5 peaches - peeled and chopped
1/4 cup fresh lemon juice
3 tbsp water
1/2 cup bourbon (I used Jim Beam)
1/3 cup packed dark brown sugar
1/4 tsp salt
6 skinless/boneless chicken breasts


Combine first 3 ingredients in a saucepan - bring to a boil - cover and reduce heat to let simmer for 30 min.  Combine peach mixture, bourbon, brown sugar, and 1/4 tsp salt in a blender and blend for 1 min until smooth.  Transfer to 13x9 baking dish and cook at 250 degrees for 2 hours and 15 minutes!  Once ready coat cooked chicken breast and enjoy.  As you can see I paired the chicken with corn on the cob.
After all of that I have to say the second peach cupcake recipe was my favorite.  I think they were some of the best cupcakes I have ever made!  The peaches made the cake so moist and perfect.  I liked both icings a lot, but if I had to choose I would probably go with the brown sugar.  I will definitely be making these again!!  Perfect summer treat!.  

xo
j